Posts

Showing posts from 2010

Charity Project: : Safari & black white Rainbow Theme

Image
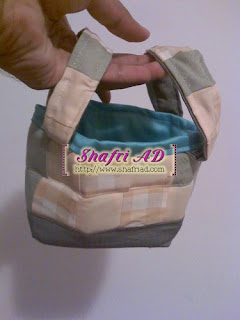
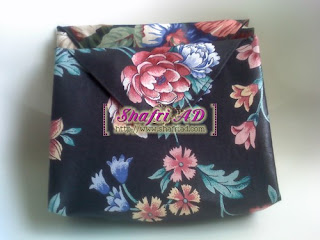
pencil case for them Just want to participate the charity organize by Kak Ayu finish all it last sunday and i already post it yesterday. hope Kak ayu receive it...  There are many tutorial that u can find using mr google. So maybe reader also can make a same like me :) just 1 pocket at the front. i use velcro. First group of five (Safari Rainbow 1) Second group of five (Safari rainbow 2) Third Group of five (Black white rainbow) I hope that orphan especially the boy are happy with this gift.. (Specially target just for boys since i know many blogger who participate will make a pencil case from a flower kind of fabric. So this pattern are much suit the boy.) Lastly, thank to kak ayu for organizing it. Maybe next year, we can do it again :)..

Scrap fabric from nykolett: First item

Image
I got this scrap from kak Rosni from nykolett last month. it been a while i plan to do with those scrap. Sorry Kak Rosni coz take more time to think what project should i do it. It just a nice scrap. :). So I browse to ayumills's fabric basket tutorial . So i just follow the tutorial she provide :) 1) All the beautiful scrap fabric from Kak Rosni. Isn't it nice.... 2) the final that i made from the 3 of the smallest scrap from that collection. 3)inner side, i use the blue fabric from my own. 4) Side view.. Although it a small basket. But it quite nice coz I can experiment it. Maybe in future, I will make a big basket :).. There are some project for next scrap to be done. have to wait :)

Dulang hantaran - white green theme

Image
It been long since I update this blog. actually I had to finish one thing that been request by my friend/housemate for his wedding. :) He ask me to decorate 'dulang hantaran'. Actually his wedding will be on early february next year. But he ask me to do it before he return to his hometown this week. So based on what he bought, i just add creativity and buy small thing just to make this simple dulang hantaran as he requested. (please ignore the background coz my room is a mess at the time i took the picture :) ) 1. All that he bought at Nilai 3 together with his fiancee. 2.Including this butterfly :) 3) The first design that I recommended to him. 4)Bunga Dulang that been completed. I just add a green ribbon and some silver ribbon to make this more beautiful (actually he bought bunga telur. So i had to separated all and recreate it back again). 5) The butterflies that I glued to the wire. 6) The dulang is packed and ready to send to his hometown. 7) The final

DIY:: Envelope style clutch & small bag

Image
Last saturday, me and my friend went out to celebrate my cousin's birthday. Actually belated birthday :). So i think i want to make something for my other 2 friends since their birthday i not give a present. so here my present to them. both clutch are a same size. 8 inch X 6 inch . One for each of them the inside of the clutch. 2 pocket so the can put phone/key. my cousin also request to make a bag for carry his thing. So i make a small bag for easy holding the inside part where had 3 pocket. Fabric are all from my keeping, while my cousin bag's fabric is actually i bought remnant from tewah. Actually, i had other idea to make from that fabric :) ok then see ya for my next project. bye.. p/s: Selamat menyambut hari raya Aidil Adha...

DIY:: iron cover - & a simple how to do

Image
When I recheck my fabric box, actually, there are left-over fabric for my cousin's comforter. So when i saw his iron cover is not changing since he bought it from ikea, so I decide to make one for his iron board. at the same time, my iron board at my home also need to get a new iron cover since it bigger than what we can buy. so i measure both of the iron board and start to make it. 1) at my cousin house. Actually this iron board is from ikea, but i do check the cover replacement, it cost about more than rm50 (if not mistaken). 2) so iron board from ikea. fabric from ikea.. perfect :) 3) the other cover at my house. 4) beneath it, i put a thick fabric to replace the span. then i cover it. So here how i do it. (sorry coz i dont take a picture for it) 1) make a pattern by tracing your iron board into the newspaper. 2) add about 4 inch for all side ( plus the seam) 3) cut the fabric based on the pattern u make. 4) sew the side and make casing for the rope.(remember to sew it twic

Comforter Set: The result...

Image
Here are the picture of the comforter which i have done for my cousin, actually, the comforter is finish last april. After that, he send to laundry. And after that, it waiting until now time to use it. -The backsite of the comforter/quilt cover. I use the square pattern of the same colour pallete. white and green. -To be honest, it quite a thrill to sew that quilt cover. It because it huge ( king size if not mistaken) which i have to use the living hall just to cut and open to pin it. But it seem worth it just to see that it fits to the quilt. -The material i use is an Ikea fabric( i think many of you recognize this fabric) the square pattern fabric, i bought it in Nagoya at jln tar. -The set come with 2 bolster cover ( 1 big and 1 small), 4 pillow cover, and also a quilt cover/comforter. So i feel satisfied with it. Maybe, in future, i will do it for my self :)...

Jom Jahit-Trim Catcher - earth theme..

Image
This time, tini from tinihani.com organize the 'jom jahit' program. But I rarely use this trim catcher (coz I always have my small dustbin beside my sewing desk). But seeing this tutorial from the stiching room . it make an idea to try this tutorial for the trim/thread catcher.. So here my final product :) 1) a pieces after sewing the bottom part. 2) the final. u can refer on the tutorial link I provide above. just a simple but nice tutorial so see ya next time.. bye..

DIY: hanging small bag

Image
Actually this was suppose to be my niece's bag for hari raya. but i couldnt manage to finish it. So i replace with other bag. Because this fabric is half-way, so i sew it and use it as my hanging bag. 3 in the group with different size to be honest, my sewing is not neat. 1) the outer. Actually this fabric is already finish by the time i make it. i use the velcro as a closure. 2) the inside, just a simple lining from the black transparent fabric.

DIY: sewing machine cover

Image
At last, my sewing machine already has his new cover. Previously only a plastic cover that come with my sewing machine. So i decided to make a new cover since based on what i read on the internet. :) The fabric i used is an upholstery fabric that i bought long time ago. it quite nice with a big pattern on it. So the step is simple u can find it on the internet. for me is like: 1) measure the sewing machine.  2) cut the fabric based on the measurement.  3) cut the fabric for pocket.  4) sew the fabric. 5) done.. 1) front side ( 2 large pocket for me to store the pattern) 2) left side ( 1 pocket each left and right side for me to store pencil or pen or ruler or scissor)